How to interpret live forex graphs for effective trading? Think of it as learning to read the secret language of the financial world – a language whispered in candlesticks and shouted in price spikes! This isn’t your grandpa’s dusty economics textbook; we’re diving headfirst into the exhilarating (and sometimes terrifying) world of live forex charts, deciphering their cryptic messages, and, most importantly, learning to profit from them.
Get ready to unlock the mysteries of support and resistance, master the art of technical indicators, and tame the wild beast of market sentiment. Buckle up, buttercup, it’s going to be a wild ride!
We’ll cover everything from the basics of candlestick charts (yes, even the terrifying “hanging man” pattern) to the advanced techniques of timeframe analysis and risk management. We’ll explore the nuances of price action, the wisdom (and sometimes folly) of technical indicators, and the subtle art of reading market sentiment. By the end, you’ll be equipped to navigate the chaotic world of forex trading with confidence (and maybe even a little swagger).
Understanding Basic Chart Elements: How To Interpret Live Forex Graphs For Effective Trading

So you want to conquer the wild west of forex trading? Fantastic! But before you saddle up your metaphorical bronco and ride off into the sunset of financial freedom, you need a map. That map, my friend, is the forex chart. Understanding its basic elements is the key to avoiding a spectacular, wallet-emptying tumble.
Forex Chart Types
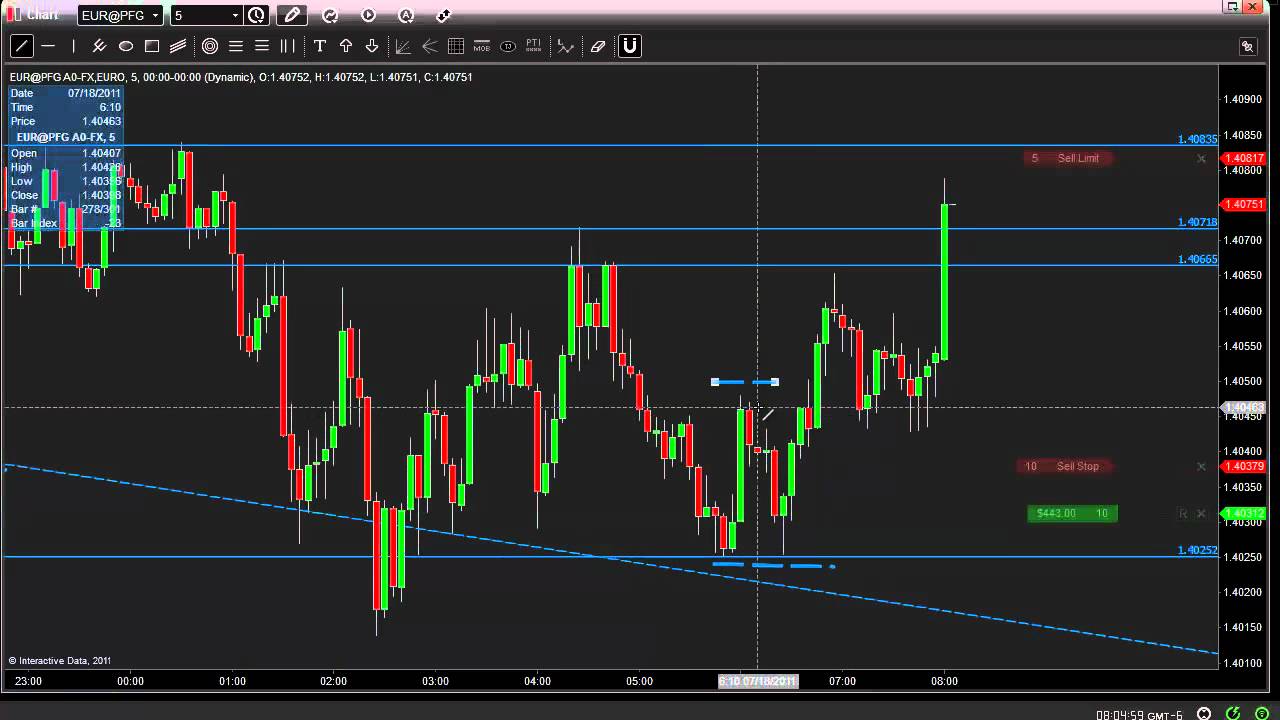
Forex charts come in various flavors, each offering a slightly different perspective on price action. Choosing the right type depends on your trading style and preferences. The three most popular types are candlestick, bar, and line charts. Candlestick charts, with their visually striking bodies and wicks, are the most popular, offering a rich tapestry of price information at a glance.
Bar charts are similar, but less visually engaging, while line charts simply connect closing prices, offering a simpler, less cluttered view. The choice is yours, but mastering at least one is crucial.
Candlestick Components: Decoding the Clues
Each candlestick is a miniature story of price movement within a specific timeframe (e.g., 1 hour, 4 hours, 1 day). Let’s break down the narrative: the “body” represents the price range between the open and close. A green (or white) body indicates a higher closing price than the opening price (a bullish candle), while a red (or black) body shows a lower closing price (a bearish candle).
The “wicks” (or “shadows”) extending above and below the body represent the high and low prices reached during that period. Imagine a candlestick as a tiny, price-telling drama; its size and color reveal much about the market’s mood.
Identifying Support and Resistance
Support and resistance levels are like invisible magnets on a price chart. Support is a price level where buyers are more numerous than sellers, preventing the price from falling further. Resistance is the opposite: a level where sellers dominate, preventing the price from rising. These levels are often formed by previous highs and lows, creating horizontal lines on the chart.
For example, if a currency pair repeatedly bounces off a price of 1.1000, that level becomes a strong support level. Conversely, if it repeatedly fails to break through 1.1200, that’s a strong resistance level. Think of them as battle lines in the currency war.
Common Chart Patterns and Their Implications
Chart patterns are recurring formations that can hint at future price movements. While not foolproof, recognizing these patterns can significantly enhance your trading decisions.
| Pattern | Description | Implication | Example |
|---|---|---|---|
| Head and Shoulders | A three-peak formation with the middle peak (the head) higher than the outer two (the shoulders). | Often suggests a bearish reversal. | Imagine a mountain range with a prominent central peak. |
| Double Top/Bottom | Two consecutive peaks (double top) or troughs (double bottom) at roughly the same price level. | Double top suggests bearish reversal; double bottom suggests bullish reversal. | Think of two identical hills or valleys on a landscape. |
| Triangle | A converging pattern formed by two converging trend lines. | Can indicate a period of consolidation before a breakout in either direction. | Visualize two lines gradually approaching each other, forming a triangle shape. |
| Flag | A short period of consolidation (the “flag”) within a strong trend. | Usually suggests a continuation of the existing trend. | Picture a flag waving on a pole; the pole represents the trend, and the flag the temporary pause. |
Interpreting Price Action
Price action trading, my friend, is the art of reading the tea leaves… except the tea leaves are forex charts, and instead of predicting your love life, you’re predicting whether the euro will soar or plummet. It’s all about observing the raw price movements – the highs, lows, and everything in between – to identify potential trading opportunities. Forget relying solely on indicators; price action is the raw, unfiltered truth of market sentiment.
On live forex graphs, this translates to spotting patterns that suggest future price direction.
Common Price Action Patterns
Understanding common price action patterns is like having a cheat sheet for market behavior. These patterns, often formed by candlestick formations, represent recurring market psychology and offer clues about potential future price movements. Recognizing these patterns significantly enhances your ability to anticipate market trends and improve trading accuracy.
- Head and Shoulders: Imagine a person’s head and shoulders on the chart. A “head” is a peak, flanked by two smaller “shoulders.” A neckline connects the troughs between the shoulders and the head. A break below the neckline typically signals a bearish trend, suggesting a price drop is imminent. Think of it as the market shrugging off its burdens and preparing for a descent.
For example, a head and shoulders pattern forming on the EUR/USD pair might indicate a weakening Euro.
- Double Tops/Bottoms: These patterns are relatively straightforward. A double top shows two similar price peaks, suggesting resistance. A break below the neckline (the low point between the peaks) indicates a bearish reversal. Conversely, a double bottom displays two similar price troughs, suggesting support. A break above the neckline (the high point between the troughs) signals a bullish reversal, a potential upward trend.
Picture a pair of bouncing balls—the second bounce might be the last before a change in direction.
Using Candlestick Patterns for Price Prediction
Candlesticks, those little rectangular boxes with wicks, are not just pretty decorations on your forex chart. Each candlestick tells a story, revealing the battle between buyers and sellers within a specific timeframe. By understanding candlestick patterns, you can decipher the market’s mood and potentially predict short-term price movements.
- Engulfing Pattern: A bullish engulfing pattern occurs when a large green candlestick completely “engulfs” a preceding smaller red candlestick. This signifies a potential shift in momentum from bearish to bullish. The opposite, a bearish engulfing pattern (large red engulfing a small green), suggests a bearish reversal. Imagine a small, weak soldier being overpowered by a larger, stronger one—a clear shift in power.
- Hammer and Hanging Man: A hammer is a small candlestick with a long lower wick and a small body, typically appearing at the bottom of a downtrend. It signals a potential bullish reversal, as buyers stepped in to prevent further price drops. A hanging man is similar but appears at the top of an uptrend, suggesting a potential bearish reversal. These patterns resemble a hammer (bullish) or a man hanging (bearish) – a visual reminder of their meaning.
Price Action Decision-Making Flowchart
This flowchart Artikels a simplified decision-making process for using price action analysis:[Imagine a flowchart here. It would start with “Identify potential price action pattern (e.g., head and shoulders, double top/bottom, engulfing pattern).” This would branch to “Is the pattern confirmed by other indicators (volume, moving averages)? Yes/No.” A “Yes” branch would lead to “Determine potential entry and exit points.” A “No” branch would lead to “Monitor price action for further confirmation or rejection of the pattern.” Finally, both branches would converge at “Execute trade (if confirmed) or wait (if unconfirmed).”]
Mastering live forex graphs is like learning a secret language of wiggling lines – decipher them right, and ka-ching! But if forex feels too tame, why not spice things up? Consider diversifying your portfolio by exploring other avenues for profit, like checking out profit from cryptocoin opportunities. Then, armed with both forex fluency and crypto savvy, you’ll be ready to conquer the financial world, one chart at a time.
Utilizing Technical Indicators
So, you’ve mastered the art of staring intensely at a forex chart, deciphering the cryptic messages whispered by price action. Congratulations! But let’s be honest, relying solely on candlestick patterns is like navigating by the stars using only a soup ladle. That’s where technical indicators, our trusty nautical charts, come in. They’re not magic, mind you, but they can add a layer of objective analysis to your gut feeling (which, let’s face it, is often wrong).
Moving Averages: Smoothing Out the Chaos
Moving averages are like the zen masters of the forex world. They take the noisy, erratic price data and smooth it out, revealing underlying trends. A simple moving average (SMA) calculates the average price over a specific period, while an exponential moving average (EMA) gives more weight to recent prices, making it more responsive to changes. Imagine an SMA as a lumbering ox, steadily plodding along the trend, while an EMA is a nimble gazelle, quick to react to any shift in direction.
Traders use moving average crossovers (when one average crosses another) as potential buy or sell signals. For example, a “golden cross” (a short-term EMA crossing above a long-term SMA) is often interpreted as a bullish signal, suggesting a potential uptrend. Conversely, a “death cross” (the opposite) might signal a bearish trend. However, relying solely on these crossovers can be risky, as false signals are common.
Oscillators: Gauging Momentum and Oversold/Overbought Conditions
Oscillators are the pulse-takers of the forex market. They measure the momentum of price movements and can help identify overbought (price has risen too quickly) and oversold (price has fallen too quickly) conditions. The Relative Strength Index (RSI), a popular oscillator, fluctuates between 0 and 100. Readings above 70 often suggest an overbought market, while readings below 30 suggest an oversold market.
The Moving Average Convergence Divergence (MACD) uses moving averages to identify momentum changes, showing potential buy/sell signals through crossovers and divergence (price moves in one direction, but the MACD moves in the opposite). The Stochastic Oscillator compares a security’s closing price to its price range over a given period. It’s like a hyperactive squirrel, bouncing between 0 and 100, signaling potential overbought/oversold conditions.
Remember, though, these indicators are not crystal balls. They can generate false signals, especially in sideways markets.
When Indicators Lie (and They Will)
Technical indicators are tools, not oracles. They are susceptible to whipsaws (rapid price reversals) and can be manipulated by large players. They also lag behind price action, meaning they confirm a trend rather than predict it. Furthermore, relying on too many indicators simultaneously can lead to “indicator soup,” a confusing mess that offers little clarity. Consider the situation where a stock is experiencing a strong uptrend.
A trader might observe the RSI is above 70 (overbought), and assume the uptrend is about to reverse. However, if the overall market sentiment is bullish, and the uptrend is still strong, the RSI reading might be misleading.
A Handy List of Commonly Used Technical Indicators
Understanding the function of different indicators is crucial. Here’s a categorized list to help you navigate this sometimes bewildering world:
- Trend Indicators: Moving Averages (SMA, EMA), MACD, Average Directional Index (ADX)
- Momentum Indicators: RSI, Stochastic Oscillator, Rate of Change (ROC)
- Volatility Indicators: Average True Range (ATR), Bollinger Bands
- Volume Indicators: On-Balance Volume (OBV), Chaikin Money Flow
Remember, these indicators are just pieces of a much larger puzzle. Use them wisely, in conjunction with sound risk management and a clear trading plan. Otherwise, you might find yourself drowning in a sea of conflicting signals.
Timeframe Analysis
Forex trading is like trying to predict the weather – sometimes a quick glance at the hourly forecast is enough, other times you need to study the seasonal patterns. Understanding different timeframes is crucial for navigating the unpredictable world of currency markets. Essentially, it’s about seeing the forest from the trees, and the trees within the forest.Different timeframes offer different perspectives on price movement.
Mastering live forex graphs is like learning a secret language of wiggling lines; understanding those wiggles means the difference between riches and…well, less riches. Before you start deciphering those cryptic charts, however, it’s crucial to understand the legal landscape. Check out the Legal and regulatory aspects of forex trading in Quebec, Canada to ensure you’re playing by the rules.
Then, armed with both knowledge of the law and those snaking graphs, you can confidently navigate the exciting (and sometimes terrifying) world of forex trading.
A short timeframe, like the one-minute (M1) chart, shows the rapid, often erratic fluctuations of the market, while a longer timeframe, such as the daily (D1) chart, reveals the underlying trends and long-term direction. Mastering this multi-faceted view is key to successful trading.
Timeframe Relationships and Trend Identification
Imagine a river. The M1 chart shows the individual ripples and eddies, while the H1 chart reveals the overall flow of the current. The D1 chart, however, shows the river’s path through the landscape, highlighting major bends and waterfalls (major trends). Shorter timeframes can provide confirmation of signals identified on longer timeframes, or they might reveal opportunities to enter or exit trades at more favorable prices.
Conversely, longer timeframes can provide context and prevent impulsive trades based on short-term noise. A strong uptrend on the D1 chart might show temporary pullbacks on the H1 chart, offering potential buying opportunities.
Deciphering those wiggly forex lines? It’s like reading a cryptic love letter from the market! Want to crack the code and become a forex whisperer? Then you’ll need the right training, and luckily, finding excellent resources is easier than you think; check out Best educational resources for learning forex trading in Canada to level up your skills.
Once you’ve mastered the basics, interpreting those live graphs will become second nature – and your profits will sing a sweeter tune!
Using Multiple Timeframes to Confirm Trading Signals
Let’s say you’re eyeing a potential long position. A bullish engulfing candlestick pattern (a large bullish candle engulfing the previous bearish candle) on the H1 chart suggests a potential upward move. However, confirmation is key. Checking the D1 chart, you see a clear uptrend, and a recent breakout above a significant resistance level. This confluence of signals on multiple timeframes significantly increases the probability of a successful trade.
Conversely, if the D1 chart shows a downtrend, you might reconsider the H1 signal, or at least adjust your risk management accordingly.
Visual Representation of Multi-Timeframe Analysis
Imagine a chart divided into four sections, each representing a different timeframe: M1, M5, H1, and D The M1 chart shows a chaotic jumble of small price fluctuations, almost indistinguishable from random noise. The M5 chart shows slightly smoother price movements, with some small trends starting to emerge. The H1 chart shows more defined trends, with clear support and resistance levels becoming apparent.
Finally, the D1 chart presents a clear, long-term trend, possibly an uptrend or a downtrend, with significant support and resistance levels clearly marked. The relationship is clear: the longer the timeframe, the smoother and more defined the price movement, revealing the underlying trend more clearly. A trader might use the D1 chart to identify the overall trend, the H1 chart to find entry points, and the M5 chart to fine-tune entry and exit points, with the M1 chart used only to confirm immediate price action near entry or exit points.
The visual would demonstrate how shorter timeframes add detail to the broader picture presented by longer timeframes, highlighting the importance of using multiple timeframes for a comprehensive market analysis.
Risk Management and Position Sizing

Forex trading, my friends, is a thrilling rollercoaster ride – but unlike your average amusement park attraction, this one can leave you with a significantly lighter wallet if you’re not careful. This section is all about strapping yourself in securely and understanding how to manage risk so you can enjoy the ride without ending up financially shipwrecked. We’ll explore the crucial elements of stop-loss orders, position sizing, and leverage to help you navigate the sometimes turbulent waters of the forex market.
Stop-Loss Orders and Placement
Stop-loss orders are your financial life preserver. They’re crucial because they automatically close a trade when the price moves against you by a predetermined amount, limiting your potential losses. Imagine them as a safety net, preventing a small dip from turning into a catastrophic plunge. On a live forex chart, you’d place your stop-loss order just below a support level (for long positions) or above a resistance level (for short positions).
Deciphering those wiggly forex lines? It’s like reading tea leaves, but with more potential for profit (and slightly less spilled chamomile). Mastering live graph interpretation is key, but remember, even the wisest chart reader needs a solid risk management plan – check out Best practices for managing risk when forex trading with Questrade to avoid turning your profits into a puddle of regret.
Then, armed with both graph-reading skills and a responsible approach, you’ll be well on your way to forex fortune (or at least, avoiding forex failure).
The precise placement depends on your risk tolerance and the volatility of the currency pair; a tighter stop-loss means less risk but potentially fewer profitable trades, while a wider one allows for more price fluctuations but exposes you to greater potential losses. Consider factors like recent price action, key support and resistance levels, and the overall market sentiment when deciding where to set your stop-loss.
Never underestimate the power of a well-placed stop-loss – it’s your best friend in the sometimes chaotic world of forex.
Position Sizing Strategies
Determining the right position size is like choosing the right sized boat for your fishing trip. Too small, and you miss out on the big catches; too big, and you risk capsizing. A common approach is the percentage-based risk management strategy, where you risk only a small percentage (e.g., 1-2%) of your trading capital on any single trade.
This approach keeps your losses contained even if multiple trades go south. Another strategy involves calculating position size based on the number of pips you’re willing to risk per trade. This method requires knowing your stop-loss placement and converting it into the appropriate lot size to achieve your desired risk level. Regardless of your chosen strategy, remember that consistency is key.
Sticking to your position sizing rules, even when tempted to over-leverage, is vital for long-term success.
Mastering live forex graphs is like learning a secret language spoken by the market gods – decipher those candlesticks, and riches await! But before you start predicting the future like a caffeinated Nostradamus, check out Questrade’s forex trading platform user reviews and ratings to see if their platform helps you speak fluent candlestick. Then, armed with user insights and chart-reading skills, you’ll be ready to conquer the forex world (or at least, avoid a spectacular financial belly flop).
Leverage and its Impact on Risk
Leverage is a double-edged sword. It magnifies both profits and losses. While it allows you to control larger positions with a smaller initial investment, it also amplifies the risk. A small market move against your position can quickly wipe out your account if you’re heavily leveraged. Think of leverage as a powerful engine – it can propel you to great heights, but it can also send you careening off a cliff if not handled with extreme caution.
Mastering live forex graphs is like learning to read a thrilling financial novel – every candlestick tells a story! But to truly capitalize on those fleeting narratives, you need lightning-fast execution. That’s where finding the right app comes in, like the ones reviewed at Best day trading app for quick execution speed and low latency. Otherwise, your brilliant interpretation will be useless! So, choose wisely, and then get back to deciphering those forex charts.
Responsible leverage management is crucial. Start with smaller leverage ratios and gradually increase them as you gain experience and confidence. Remember, the goal isn’t to maximize leverage; it’s to maximize your chances of consistent profitability.
Risk Management Techniques Comparison
| Technique | Description | Pros | Cons |
|---|---|---|---|
| Fixed Fractional Position Sizing | Risk a fixed percentage of your capital on each trade. | Simple, consistent risk management. | Can limit potential profits. |
| Fixed Pips Risk | Risk a fixed number of pips on each trade. | Easy to calculate position size. | Requires careful stop-loss placement. |
| Martingale System (Generally Discouraged) | Double your position size after a loss. | Potentially recovers losses quickly. | High risk of substantial losses, can quickly deplete capital. |
| Kelly Criterion | Calculate optimal position size based on win rate and average win/loss ratio. | Potentially maximizes long-term growth. | Requires accurate estimation of win rate and win/loss ratio; complex calculation. |
Recognizing Market Sentiment

Forex trading isn’t just about charts and numbers; it’s about reading the collective psyche of the market – its sentiment. Understanding whether the market is feeling optimistic (bullish) or pessimistic (bearish) is crucial for making informed trading decisions. Think of it as trying to guess what the next person in line at the ice cream shop will order – if everyone’s getting chocolate, you might want to jump on that bandwagon (or maybe grab the last strawberry).
But unlike ice cream, bad guesses in forex can be costly!Market sentiment, while intangible, leaves clear fingerprints on live forex charts. These fingerprints aren’t smudged; they’re quite visible if you know where to look. We’ll explore the visual cues, the role of volume, the impact of news, and a systematic approach to sentiment analysis.
Visual Cues Indicating Bullish or Bearish Sentiment
Sharp upward price movements, often accompanied by increased volume, are strong indicators of a bullish market. Imagine a rocket launching – that’s the kind of momentum you’re looking for. Conversely, steep downward trends, again with higher volume, signal a bearish market – picture a rollercoaster plunging down. Sustained price consolidation within a tight range might suggest indecision or a period of market pause before a significant move in either direction.
Consider the candlestick patterns: long green candles often indicate bullish pressure, while long red candles represent bearish pressure. However, remember that context is key; a single candle doesn’t define the whole story.
Volume Confirmation of Price Movements and Sentiment
Volume acts as a crucial confirming factor. A strong upward move accompanied by high volume suggests strong buying pressure and confirms the bullish sentiment. Conversely, a significant price drop with high volume confirms bearish sentiment, indicating a robust selling pressure. Low volume during a price movement, however, might suggest a lack of conviction and a potential for a price reversal.
Think of it like this: a small crowd cheering is different from a stadium roaring – the volume reflects the intensity of the emotion.
News Events and Their Impact on Forex Charts and Trader Sentiment
Unexpected news events, such as a surprise interest rate hike or a geopolitical crisis, can dramatically shift market sentiment. For example, the unexpected announcement of a major central bank raising interest rates could instantly trigger a surge in the value of that country’s currency, reflecting a sudden shift to bullish sentiment. Conversely, news of a major economic downturn could cause a rapid devaluation, leading to a bearish sentiment.
The release of employment data, inflation reports, and political pronouncements can all influence trader psychology and manifest visually on forex charts as sharp price swings. Remember the Brexit vote? That was a market-shaking event that sent ripples (or rather, tidal waves) through the forex market.
Step-by-Step Procedure for Analyzing Market Sentiment, How to interpret live forex graphs for effective trading
Analyzing market sentiment is not a one-size-fits-all approach. A multi-faceted approach combining different chart patterns, indicators, and news events is usually the most effective.
1. Observe Price Action
Begin by examining the overall price trend. Is it trending upwards (bullish), downwards (bearish), or sideways (consolidating)?
2. Assess Volume
Compare the volume to the price movement. High volume accompanying a price trend confirms the sentiment. Low volume casts doubt on the sustainability of the move.
3. Analyze Candlestick Patterns
Identify candlestick patterns like hammer, hanging man, engulfing patterns, etc., which offer insights into potential trend reversals or continuations.
4. Utilize Technical Indicators
Employ indicators like RSI (Relative Strength Index), MACD (Moving Average Convergence Divergence), and Bollinger Bands to gauge momentum and potential overbought or oversold conditions. These indicators provide additional confirmation or divergence signals.
5. Consider News Events
Analyze the impact of recent news events and economic data releases on the market. Unexpected news can often trigger sharp shifts in sentiment.
6. Synthesize Information
Combine the insights from the above steps to form a comprehensive view of the market sentiment. Remember, different indicators might give conflicting signals, requiring careful judgment and experience.
Final Thoughts

So, you’ve journeyed through the thrilling landscape of live forex graphs, conquered the candlestick jungle, and tamed the wild oscillators. You’ve learned to spot patterns, predict movements (with a healthy dose of caution, of course!), and manage risk like a seasoned pro. Remember, the forex market is a dynamic beast, ever-changing and full of surprises. But armed with the knowledge gained here, you’re now equipped to approach it with a keen eye, a sharp mind, and (dare we say it?) a little bit of fun.
Happy trading!