Which indicators are best for identifying short-term day trading opportunities? Ah, the million-dollar question (or at least, the question that could make you a few thousand!). Day trading is a high-octane game of predicting the market’s next move, and the right indicators can be your secret weapon. From candlestick patterns whispering secrets of future price action to volume confirming breakouts with the force of a thousand suns, we’ll explore the arsenal of tools available to the short-term trader.
Get ready to sharpen your analytical skills and navigate the thrilling world of intraday trading!
This guide dives deep into the world of technical analysis, exploring various indicators that can help you identify those fleeting opportunities in the fast-paced world of day trading. We’ll examine price action, volume, momentum, and volatility indicators, explaining how each can be used individually and in combination to improve your trading accuracy. We’ll also look at how to manage risk effectively and discuss the importance of combining technical analysis with sound risk management principles.
Buckle up, it’s going to be a wild ride!
Price Action Indicators
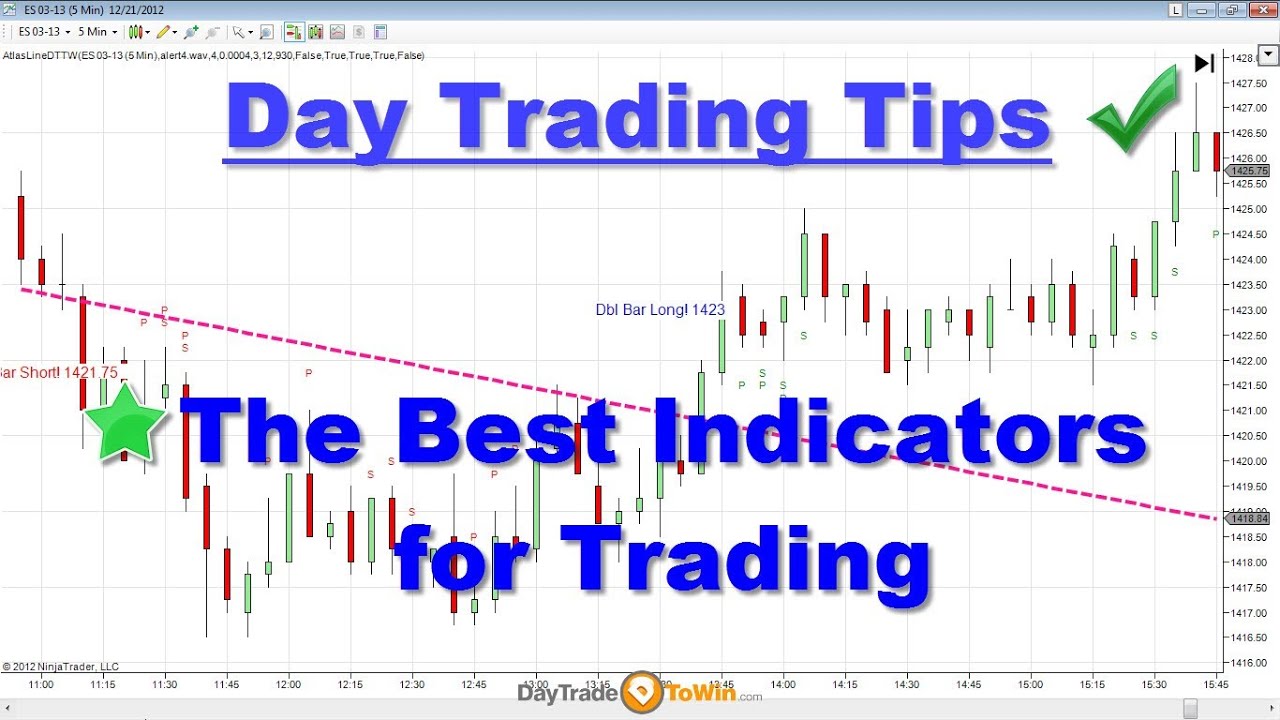
Day trading, that thrilling rollercoaster of quick profits and equally quick losses, relies heavily on reading the tea leaves – or rather, the candlestick patterns and moving averages – of the market. Successfully navigating this wild ride demands a keen eye for short-term price movements, and that’s where price action indicators come in. They’re your trusty compass in the chaotic sea of buy and sell orders.
Candlestick Patterns, Which indicators are best for identifying short-term day trading opportunities?
Candlestick patterns are like hieroglyphs of the market, each one whispering tales of potential reversals or breakouts. Understanding these patterns is crucial for timing your entries and exits. A single candlestick might not tell the whole story, but a sequence of them can paint a vivid picture of the market’s sentiment. Think of it as reading a thrilling, albeit sometimes cryptic, financial novel.
| Pattern Name | Description | Bullish Signal | Bearish Signal |
|---|---|---|---|
| Hammer | Small real body with a long lower shadow, suggesting buyers stepped in to prevent further decline. | Appears at the bottom of a downtrend. | Rarely a bearish signal; usually indicates indecision. |
| Engulfing Pattern | A large candle completely engulfs the previous candle. | Bullish engulfing occurs when a large green candle follows a red candle. | Bearish engulfing occurs when a large red candle follows a green candle. |
| Doji | A candle with very small or no real body, indicating indecision in the market. | Can signal a potential reversal in a downtrend. | Can signal a potential reversal in an uptrend. |
| Shooting Star | Small real body with a long upper shadow, indicating sellers pushed prices higher but buyers failed to sustain the momentum. | Rarely a bullish signal; usually indicates indecision. | Appears at the top of an uptrend. |
Moving Averages
Moving averages smooth out price fluctuations, revealing underlying trends. By comparing different moving averages (like a 5-period, 10-period, and 20-period), day traders can identify potential entry and exit points. Think of them as your market’s trend whisperers. A simple moving average (SMA) simply averages the closing prices over a specified period. An exponential moving average (EMA) gives more weight to recent prices, making it more responsive to changes.
So, you’re hunting for short-term day trading gems? Forget crystal balls, focus on trusty indicators like RSI and MACD. But if you’re specifically eyeing cheap thrills, check out this list for potential plays: Best TSX stocks under $5 for day trading in November 2024? Remember though, even the best indicators are just hints; proper risk management is the real secret sauce for successful day trading.
A weighted moving average (WMA) allows for custom weighting of prices, providing flexibility. The choice depends on your trading style and risk tolerance. For instance, a fast-moving average (like a 5-period EMA) might be preferred by scalpers, while longer-term averages might suit swing traders.
Support and Resistance Levels
Support and resistance levels are like magnetic forces in the market. Support is a price level where buyers are likely to step in, preventing further price declines. Resistance is the opposite – a price level where sellers are likely to emerge, halting further price increases. Breakouts and breakdowns occur when the price decisively moves beyond these levels, often signaling significant changes in momentum.
Pinpointing those sweet, short-term day trading opportunities? It’s all about the right indicators, baby! Think of it like building muscular strength; you need the right exercises, and just like checking out muscular strength exercises for gains, you need to focus on volume, RSI, and maybe even a touch of MACD for those lightning-fast trades. Master those indicators, and you’ll be flexing your trading muscles in no time!
Identifying these levels through price action analysis allows for strategic entry and exit points. For example, a breakout above a strong resistance level could indicate a bullish trend continuation, while a breakdown below a strong support level might signal a bearish trend. These levels aren’t absolute; they’re dynamic and can shift over time.
Wrestling with which indicators scream “short-term day trading gold”? Forget crystal balls; savvy traders rely on things like RSI and moving averages. But choosing the right platform is half the battle! Check out this review of Review of OADANA forex trading platform and its features to see if it boosts your indicator game. Then, armed with the right tools and platform, you can conquer those fleeting market moments.
Volume Indicators
Volume, the often-overlooked sidekick of price, is actually a crucial character in the day trading drama. It’s not just about how much the price moves, but
how much volume* accompanies those moves. Think of it like this
a lone wolf can make a lot of noise, but a pack of wolves creates a real stampede. Similarly, a price surge with high volume is far more significant than a quiet, low-volume creep.Volume confirms price movements, adding an extra layer of confidence (or caution!) to your trading decisions. High volume during a breakout signifies strong conviction from market participants, suggesting the move is likely to continue.
Conversely, low volume during a price move indicates weak momentum, suggesting a potential reversal or lack of conviction behind the price action. Ignoring volume is like navigating a ship without a compass – you might get somewhere, but it’s unlikely to be where you intended.
On-Balance Volume (OBV) Divergence
The On-Balance Volume (OBV) indicator is a cumulative volume indicator that helps identify divergences between price and volume. Essentially, it tracks the cumulative volume based on whether the price closes higher or lower than the previous day’s close. A bullish OBV divergence occurs when the price makes lower lows, but the OBV makes higher lows. This suggests that while the price is falling, buying pressure is increasing, indicating a potential price reversal to the upside.
Imagine a graph: the price line dips lower twice, creating two lower lows. However, the OBV line creates two higher lows, indicating a growing number of buyers stepping in despite the downward price action. This visual divergence is a bullish signal.Conversely, a bearish OBV divergence occurs when the price makes higher highs, but the OBV makes lower highs.
This shows that even though the price is rising, the buying volume is weakening, indicating a potential price reversal to the downside. Again, visualize the graph: the price line peaks twice, forming higher highs. But the OBV line forms lower highs, suggesting sellers are gaining ground. This bearish divergence flags a potential downturn.
Combined Price-Volume Analysis for Short-Term Trading
Combining price action with volume analysis significantly improves trading accuracy. Here’s a step-by-step approach for short-term day trading:
1. Identify potential trade setups using price action
Look for patterns like breakouts, pullbacks, or candlestick patterns that suggest potential price movements. Think of this as identifying thelocation* of your potential treasure.
-
2. Confirm the setup with volume
High volume accompanying a breakout confirms the strength of the move and increases the probability of a successful trade. Low volume, however, casts doubt on the sustainability of the price movement. This is like checking if the treasure chest is actually
- full* of gold, not just a few shiny rocks.
3. Analyze OBV for divergences
Look for bullish or bearish divergences to confirm or contradict your price action analysis. This acts as a second opinion, ensuring your treasure isn’t actually a trap.
4. Consider the overall market context
Volume analysis is more effective when considered within the broader market sentiment. High volume in a strong uptrend is more bullish than high volume in a weak, sideways market. This adds the context of whether your treasure is in a safe and well-protected area, or a dangerous, contested zone.
5. Place your trade with appropriate risk management
Even with thorough price and volume analysis, risk management is crucial. Use stop-loss orders to protect your capital. This is securing your treasure once you have it – it’s pointless to find gold if you don’t protect it from thieves.
Momentum Indicators: Which Indicators Are Best For Identifying Short-term Day Trading Opportunities?
Momentum indicators are the spicy jalapenos of the day trading world – they add a kick of excitement (and potential profit!) by highlighting the speed and strength of price movements. Unlike the more sedate price action indicators, these guys are all about thechange* in price, not just the price itself. Understanding their nuances can be the difference between a winning trade and a fiery regret.
Relative Strength Index (RSI), Stochastic Oscillator, and Moving Average Convergence Divergence (MACD) Comparison
Let’s pit three popular momentum indicators against each other: the RSI, the Stochastic Oscillator, and the MACD. Each has its own strengths and weaknesses, making the choice of which to use (or even better,
combine*) a matter of personal preference and trading style.
| Indicator | Strengths | Weaknesses |
|---|---|---|
| RSI | Easy to understand and interpret; identifies overbought and oversold conditions; can signal potential trend reversals. | Can generate false signals; prone to whipsaws in sideways markets; the standard 14-period setting may not be optimal for all assets or timeframes. |
| Stochastic Oscillator | Sensitive to short-term price changes; can identify momentum shifts early; useful in ranging markets. | Prone to false signals; can be overly sensitive to noise; requires careful interpretation to avoid whipsaws. |
| MACD | Identifies momentum shifts and potential trend reversals; provides confirmation signals through crossovers and divergences; can be used to filter out noise. | Can lag behind price movements; requires understanding of histograms and signal lines; may not be as effective in ranging markets. |
Interpreting Overbought and Oversold Conditions with RSI and Stochastic Oscillator
The RSI and Stochastic Oscillator both operate on the principle that assets can become “overbought” (too high) or “oversold” (too low), suggesting potential reversals. RSI values above 70 are generally considered overbought, while values below 30 are considered oversold. For the Stochastic Oscillator, values above 80 are overbought, and below 20 are oversold. These levels aren’t hard and fast rules; they’re guidelines.
A stock might remain overbought for an extended period during a strong uptrend, for example. Imagine a stock whose RSI suddenly plummets from 75 to 25. This sharp drop into oversold territory could signal a potential buying opportunity, suggesting a possible bounce back. Conversely, a stock whose Stochastic Oscillator climbs rapidly above 80 might signal a potential short-selling opportunity, anticipating a price correction.
Remember, these are just potential signals; confirming with other indicators and price action is crucial.
Using MACD to Identify Momentum Shifts and Potential Trend Reversals
The MACD is a trend-following momentum indicator that uses a combination of moving averages to identify momentum shifts. It consists of a MACD line (the difference between two exponential moving averages), a signal line (a moving average of the MACD line), and a histogram (the difference between the MACD and signal lines).Here’s a step-by-step guide to using MACD signals in day trading:
1. Identify the MACD Line Crossover
So, you’re itching to conquer the wild west of day trading? Finding the perfect indicators is like searching for the Holy Grail – some swear by moving averages, others by RSI. But before you dive headfirst into that thrilling (and potentially terrifying) world, maybe check out this handy guide: Forex trading for dummies: a simple step-by-step guide.
Then, armed with newfound knowledge, you can confidently tackle those short-term opportunities and (hopefully) avoid becoming another day-trading casualty.
A bullish crossover occurs when the MACD line crosses above the signal line, suggesting a potential uptrend. A bearish crossover happens when the MACD line crosses below the signal line, suggesting a potential downtrend.
2. Analyze the Histogram
The histogram reinforces the MACD line’s signals. Increasing histogram bars confirm bullish momentum, while decreasing bars confirm bearish momentum.
3. Look for Divergences
So, you’re diving headfirst into the wild world of day trading, huh? Figuring out which indicators are best – RSI, MACD, maybe even some wacky custom ones – is crucial. But first, you’ll need a solid platform, and finding the Best Canadian day trading platform for beginners in 2024? is step one. Once you’ve got that sorted, you can start mastering those indicators and hopefully, not lose your shirt (or your loonies!).
Remember, even the best indicators need a good platform to shine.
Divergences occur when the price action and the MACD move in opposite directions. A bullish divergence happens when the price makes lower lows, but the MACD makes higher lows. This suggests a potential bullish reversal. A bearish divergence is the opposite.
4. Combine with Other Indicators
Never rely solely on the MACD. Confirm its signals with price action, volume, and other indicators for a more robust trading strategy. Think of the MACD as one piece of a larger puzzle, not the entire picture.
So, you’re hunting for those fleeting, juicy day trading opportunities? Forget crystal balls; reliable indicators like RSI and MACD are your best pals. But before you dive headfirst into the wild world of short-term trades, you might want to figure out the best platform – check out Which is the best forex broker in Canada for beginners?
to find your trading home. Then, armed with a solid broker and your trusty indicators, you can conquer those short-term market swings!
5. Manage Risk
Always use appropriate risk management techniques, such as stop-loss orders, to protect your capital. Even the best indicators can be wrong sometimes.
Volatility Indicators
Volatility, the rollercoaster of price swings, is the spice of life for a day trader – and the potential cause of their financial demise. It’s a double-edged sword, offering the chance for quick profits but also the risk of equally swift losses. Understanding and measuring volatility is crucial for navigating the wild world of short-term trading. Think of it like this: a calm lake is great for leisurely paddling, but a raging river offers the thrill of white-water rafting – with the potential for a very soggy end.Volatility indicators help us quantify this “thrill” and “sogginess,” allowing us to assess risk and potentially capitalize on opportunities.
High volatility presents chances for substantial gains in short periods, but also significantly increases the likelihood of substantial losses. Conversely, low volatility might limit potential profits but also mitigates risk. The key is finding the sweet spot where risk and reward are balanced, and that’s where these indicators come in.
Average True Range (ATR)
The Average True Range (ATR) is a simple yet powerful tool for measuring market volatility. It calculates the average range of price movement over a specified period, typically 14 days. A higher ATR indicates greater volatility, suggesting potentially larger price swings and therefore, higher risk and reward. A lower ATR signifies lower volatility, implying smaller price movements and potentially smaller profits and losses.
The ATR is calculated using the largest of three values: the current high minus the current low, the absolute value of the current high minus the previous close, and the absolute value of the current low minus the previous close. The average of these values over a defined period (e.g., 14 days) gives us the ATR.
ATR = Average of the True Range over ‘n’ periods
ATR can be used to set appropriate stop-loss levels. For example, a trader might set their stop-loss at 2 times the ATR below their entry price. This provides a cushion against sudden price drops. Similarly, ATR can aid in position sizing. If the ATR is high, suggesting high volatility, a trader might reduce their position size to limit potential losses.
Conversely, a low ATR might allow for a larger position size. Imagine trading a stock with a high ATR – you wouldn’t want to bet the farm on it! A more conservative position size would be prudent.
Bollinger Bands
Bollinger Bands are another popular volatility indicator, visually representing price volatility relative to a moving average. They consist of three lines: a simple moving average (usually 20-period) and two standard deviation bands above and below the moving average. When the bands are squeezed together, it often suggests low volatility and a potential for a breakout. This “squeeze” can be a precursor to a significant price movement in either direction.
Conversely, wide bands indicate high volatility.Bollinger Band squeezes offer a potential entry point for day traders. A breakout from a squeeze, whether upwards or downwards, can signal a strong trend, providing an opportunity to enter a trade in the direction of the breakout. The bands themselves can also act as potential support and resistance levels. For example, a bounce off the lower band might be a buy signal, while a rejection at the upper band might signal a sell.Imagine a stock price trading within a tight Bollinger Band squeeze for several days.
Suddenly, the price breaks out above the upper band with increased volume. This is a classic example of a bullish breakout signal, suggesting a potential upward trend. Conversely, a bearish breakout would be signaled by a price drop below the lower band, also accompanied by increased volume. A trader might enter a long position on a bullish breakout and a short position on a bearish breakout, using the bands as their initial stop-loss and take-profit levels.
Combining Indicators

So, you’ve mastered the individual indicators – the price action ninjas, the volume vigilantes, the momentum maniacs, and the volatility vultures. Now, let’s unleash the ultimate day trading beast: combining these forces for maximum profit (and hopefully, minimal tears). Think of it as assembling your own superhero team, each member bringing unique skills to the table.
The power of combining indicators lies in confirmation. A single indicator can be a fickle friend, prone to false signals and leading you down the garden path (a very expensive garden path, at that). But when multiple indicators align, singing in harmonious agreement, it’s like hearing the angels of the market whispering sweet nothings of impending riches.
A Hypothetical Day Trading Strategy
This strategy, lovingly dubbed “The Trifecta,” combines the Relative Strength Index (RSI), Moving Average Convergence Divergence (MACD), and volume. We’ll use a 15-minute chart for our analysis.
Entry Criteria: A long position is entered when:
- The RSI crosses above 30, signaling potential oversold conditions.
- The MACD line crosses above its signal line, indicating a bullish momentum shift.
- Trading volume increases significantly on the breakout candle, confirming the price movement.
Exit Criteria: A long position is exited when:
- The RSI crosses above 70, suggesting overbought conditions and potential reversal.
- The MACD line crosses below its signal line, signaling a bearish momentum shift.
- A significant price drop occurs, indicating a change in market sentiment.
Short positions would be the inverse of this strategy.
Risk Management in Multi-Indicator Strategies
Using multiple indicators doesn’t magically eliminate risk; it just helps to better define it and mitigate potential losses. It’s like having a really good map – it helps you navigate, but it won’t stop you from falling into a pit if you’re not careful.
Effective risk management techniques include:
- Position Sizing: Never risk more than 1-2% of your trading capital on any single trade, regardless of how confident you are. This limits potential losses and allows you to survive those inevitable losing trades.
- Stop-Loss Orders: Always use stop-loss orders to automatically exit a trade if the price moves against you. This prevents large losses from snowballing into a catastrophic avalanche.
- Take-Profit Orders: Lock in your profits by setting take-profit orders. Greed is a trader’s worst enemy; let your strategy dictate your exits.
- Diversification: Don’t put all your eggs in one basket (or one stock). Diversify your portfolio across different assets to reduce overall risk.
Performance Comparison: Trifecta vs. Simple Price Action
Let’s imagine a hypothetical scenario. Over a three-month period, the Trifecta strategy yielded an average return of 10% with a maximum drawdown of 5%. A simple price-action strategy (buying dips and selling rallies) during the same period might have yielded a return of 7%, but experienced a maximum drawdown of 8%.
While the Trifecta strategy generated a higher return, it’s crucial to note that past performance is not indicative of future results. The lower drawdown of the Trifecta demonstrates the potential benefits of combining indicators for risk management. The additional confirmation provided by multiple indicators leads to fewer false signals and more controlled risk exposure.
Final Wrap-Up
So, the quest for the holy grail of short-term trading indicators? It’s less about finding the
-one* perfect indicator and more about mastering a toolbox of techniques. By understanding price action, volume, momentum, and volatility, and by skillfully combining these insights, you’ll equip yourself to navigate the unpredictable waters of the day trading market. Remember, even the best indicators require discipline, risk management, and a healthy dose of patience.
Happy trading!